Remember when making a video felt like a huge undertaking? You needed expensive cameras, complex editing software, and a ton of patience just to get a few seconds of footage.
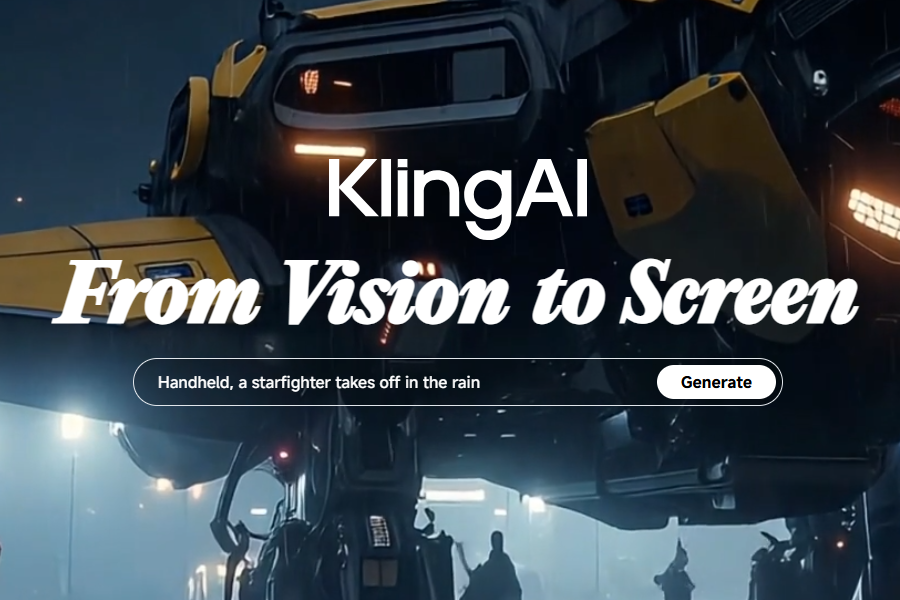
A new wave of AI tools is making video creation accessible to anyone with an idea. Among them, one AI video tool is making some serious waves: Kling AI. It’s turning simple text descriptions and still images into dynamic, captivating videos faster than you can say “action.”
If you’ve ever had a brilliant idea for a video but felt stuck staring at a blank screen, you’re in the right place. This guide is more than a simple tutorial on how to use Kling AI; it’s your roadmap to unlocking a whole new level of creative power.
What Is Kling AI?
Kling AI is your production studio powered by artificial intelligence. Unlike clunky editing software that requires hours of tutorials, Kling AI works like a creative partner that understands plain English.
Here’s what makes it special:
Text-to-Video Magic
Describe any scene in detail, and watch Kling AI assemble it frame by frame. Want “a cyberpunk cityscape with neon holograms reflecting on wet pavement as a hovercar zooms by”? Consider it done. The AI interprets your words like a Hollywood storyboard artist.
Image-to-Video Alchemy
That breathtaking sunset photo from your Bali trip? Upload it and tell Kling AI to “pan slowly across the horizon with palm leaves swaying in the foreground.” Suddenly, your vacation snap becomes a cinematic trailer.
How to Create Your Kling AI Account in 4 Minutes Flat
Getting started is easier than setting up a Netflix subscription:
- Visit the Official Site
Pro tip: Bookmark the page—you’ll be visiting often. - Click That Sign-Up Button
The cheerful “Get Started” button (usually top-right) is your gateway. No lengthy forms—just email verification. - Verify & Dive In
Check your inbox for the confirmation link. If it’s not there within 2 minutes, peek in your spam folder—sometimes AI gets overly enthusiastic.
Bonus: No credit card required for the free tier. You can start creating immediately, though heavy users might eventually want premium features.
How to Use Kling AI to Create Videos
Kling AI’s creative engine is built around its two powerful generation tools. Let’s walk through how to master each one, step by step.
Text-to-Video Generation
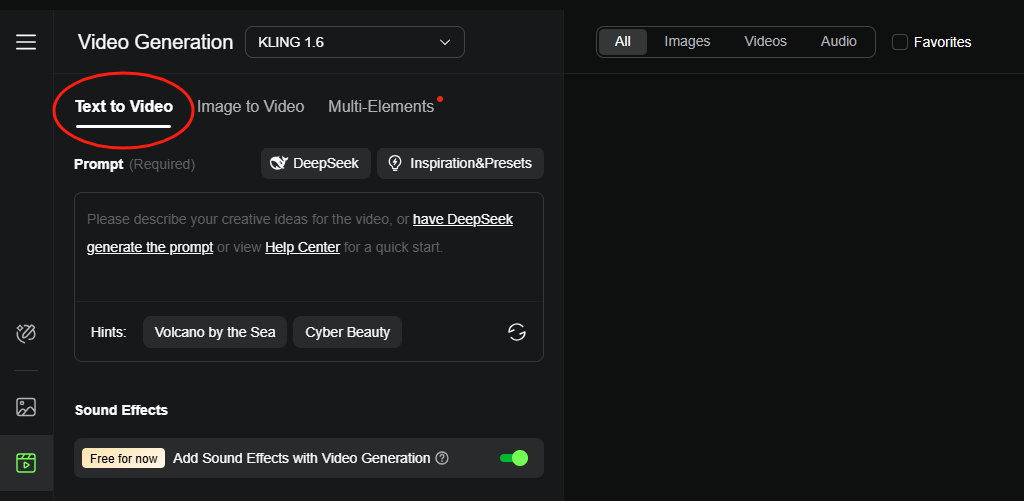
This feature is a dream come true for anyone who can visualize a scene but struggles to film it. Here’s how to use words to paint a moving picture:
- Navigate to the creative hub: Once you’re logged in, your dashboard will have a menu. Look for the “AI Videos” section and click it. This is where all the action happens.
- Select “Text to Video”: You’ll see a few options for different video types. Choose “Text to Video” to begin your journey with words.
- Craft a killer prompt: This is the most crucial step. The more specific your description, the better the AI can bring your vision to life. Instead of a generic prompt like “a cat playing,” try something richer: “a fluffy white cat pouncing on a red yarn ball in a sunlit living room, with a vintage radio playing soft jazz in the background.” Be a director with your words: include details about the setting, lighting, colors, and mood.
- Tweak the settings: Kling AI gives you a few sliders and buttons to fine-tune your results:
- Creativity level: “Standard” will stick close to your prompt, while “Professional” adds a more artistic and unique flair.
- Relevance: Increase this if you want the video to follow your prompt exactly, or decrease it if you’re open to some creative surprises.
- Aspect ratio: Choose the screen size that’s best for where you’ll share the video (more on this in the tips section!).
- Choose a style: Want a Hollywood feel? Go with “cinematic.” Prefer a hand-drawn look? Pick “anime” or “cartoon.” There are a number of options to match your creative vibe.
- Add camera movements (optional but cool): Take your video to the next level by telling the AI how to move its virtual camera. Try “a slow zoom into the cat’s face” or “a pan left to reveal a bookshelf.” You’re the director!
- Hit “Generate”: Now, sit back and let Kling AI do its thing. The process might take a minute or two, depending on the complexity of your prompt.
Pro tip: If the first video isn’t perfect, don’t worry! Just tweak your prompt—maybe add “warmer lighting” or “faster movement”—and try again. The AI learns from your feedback, and small changes can make a big difference.
Image-to-Video Generation
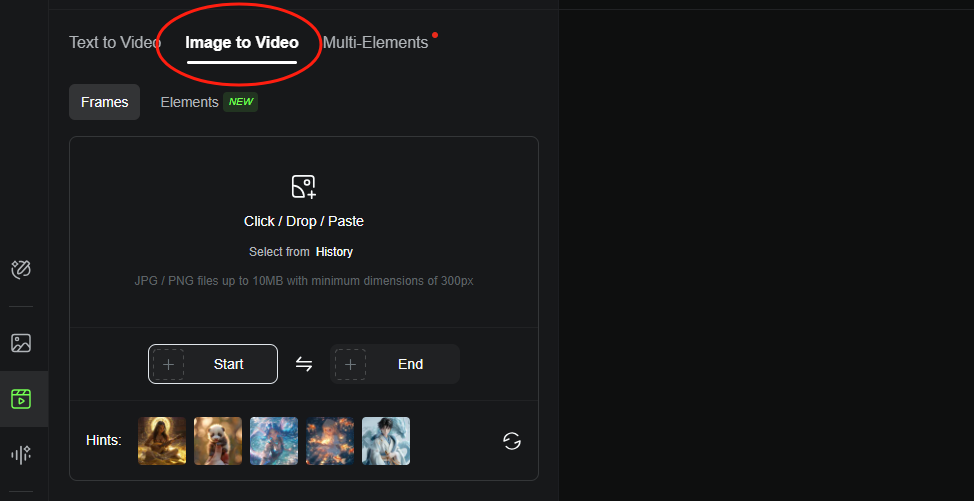
Have a favorite photo that just feels like it should be moving? Kling AI can bring it to life. Here’s how to turn your still images into moving masterpieces:
- Return to “AI Videos”: Go back to the main creative hub where you started.
- Select “Image to Video”: This is where you’ll upload and animate your photos.
- Upload your main image: Click “Click / Drop / Paste” to add your photo. For the best results, use a high-quality JPG or PNG file that’s under 10MB. The AI works best with clear, well-lit images.
- Add an end image (optional): For a smooth transition, upload a second photo. Kling AI will generate a video that seamlessly morphs from the first image to the second—perfect for “before and after” comparisons or visual storytelling.
- Use the Motion Brush (optional but highly recommended): This is where you get to play. Use the brush tool to “paint” the specific areas you want to animate. For example, you can brush over waves to make them crash, or a bird to make it fly. It’s like giving the AI a custom animation map.
- Write a prompt (optional): Even if you’ve used the Motion Brush, a quick description can guide the AI and set the mood. Try “waves crashing gently on the shore, seagulls flying overhead, soft sunlight.”
- Adjust the settings: Just like with Text-to-Video, you can play with the creativity level and aspect ratio here.
- Generate your video: Click “Generate” and give it a moment. More complex animations will take a little longer, but the wait is worth it.
- Preview and refine: Watch the video once it’s done. If something seems off, go back and adjust your prompt or Motion Brush strokes.
- Download and share: Once you’re happy with the result, download it and share it with the world—on Instagram, TikTok, YouTube, or your personal blog.
5 Insider Tips for Kling AI Mastery
1. Write Prompts Like a Movie Narrator
The AI isn’t a mind reader, so be as specific as you can. Instead of “a dog in a park,” try “a brown labrador shaking water off its fur after a rainstorm, with kids laughing in the background and a colorful rainbow in the sky.” Include all the details:
- Setting: Where is it?
- Lighting: Is it a moody sunset or bright daylight?
- Actions: What’s happening?
- Colors: Are they vibrant or muted?
- Mood: Is the scene happy, mysterious, or nostalgic?
2. Use High-Quality Images
For the Image-to-Video tool, your photo is the AI’s blueprint. Blurry or dark images make it hard for Kling AI to figure out what to animate. Stick to:
- Clear subjects: Make sure the main focus isn’t a tiny, hard-to-see object.
- Good lighting: Natural light works wonders.
- Simple backgrounds: Too much clutter can confuse the AI.
3. Choose the Right Aspect Ratio
A video that looks amazing on TikTok might look awkward on YouTube. Use this cheat sheet:
- 9:16: Perfect for vertical formats like Instagram Reels, TikTok, or Stories.
- 1:1: Great for square posts on Instagram or Facebook.
- 16:9: The classic widescreen format for YouTube, websites, or TV screens.
4. Start with Short Clips
It’s a good idea to begin with short, 5-10 second clips. They’re easier for the AI to generate and tend to be smoother. You can tackle longer videos once you’re more comfortable with the process.
5. Test, Tweak, Repeat
Your first video probably won’t be perfect, and that’s completely okay! The process is about experimentation. If the colors are off, add “vibrant, saturated colors” to your next prompt. If the movement is too slow, try “fast-paced, energetic camera pans.” Small adjustments can lead to huge improvements.
Conclusion on How to Use Kling AI
Whether you’re a content creator needing to pump out fresh reels, a marketer looking for quick ad visuals, or an artist exploring a new medium, Kling AI allows you to bring ideas to life without the steep learning curve of traditional video editing software.
Treat the AI like a collaborative artist—the more vivid your descriptions, the more stunning the results.
Ready to experiment? Grab that idea you’ve been sitting on, head to Kling AI, and type it out. Your first viral video might be one prompt away.